
Last Updated on October 15, 2021
Wood lathes are small tools people use for woodturning in carpentry or woodshop crafts. The wood lathe can be used for different kinds of tasks, no matter how big or small the wood you are working with is.
If you are a carpenter or any other industrial woodworker, then it is expected you will know about such tools. But if you are a beginner and want to try woodshop craft, then you need to be acquainted with wood lathes. That is why, here, we will help you understand how to use a wood lathe.
How To Use A Wood Lathe?
If you are using a wood lathe, there are some things you need to know beforehand so that operating the tool becomes easier. Hopefully, everything will start to make sense to you. Below we have given a few detailed steps to help you know about the wood lathe and how to use it:
Step 1: Understanding The Wood Lathe And Its Components
When you are out to buy a wood lathe you will need to notice certain physical features of the tool.
A wood lathe consists of components such as the motor, tailstock, speed options, tool rest, and others. The explanation of these components is given below:
Motor
It is the main power source of the wood lathe. The wood lathe isn’t a manual tool; it is an electrical tool and is powered by electricity just like every other electrical power tool is. That electricity runs right through the wood lathe’s motor and operates it.
Depending on the size of the wood lathe you buy, you will get different levels of horsepower they offer. The general range of horsepower you will find for wood lathe motors is from ¾ horsepower to 2 horsepower.
This motor is set on the left side of the wood lathe, which is known as the wood lathe’s headstock. Depending on the wood lathe’s model, the areas the motor could be located; they would either be inside that headstock or under it.
Speed Controls
The wood lathe tool has variable speed and power control systems. This way you can utilize the different speeds available on the lathe tool and bring out the best performance when working on wood.
These controls for speed and power are designed like a belt pulley and have electric and mechanical mechanisms. Because of these electric and mechanical mechanisms, you can apply a certain speed to a chosen application. The range you get on these speed controls is from 500 to 3000 revolutions per minute (RPM).
Knowing how to control speed and power is important when you are cutting different sizes of wood.
For example, a small piece of wood would need higher RPM so that you can cut through with more precision and cut effectively. The smaller the piece of wood you are dealing with, the more delicate your work needs to be. So, using more RPM will help you attain that.
The opposite goes for larger blocks of wood, as roughly cutting them will not matter significantly, since you eventually have to use smaller tools like chisels to perfect the shape of the wood.
Tailstock And Headstock
We already have mentioned that the left side of the wood lathe is the headstock part, this is the area where the motor of the wood lathe is.
It accepts electricity through the motor and turns it into power for the wood lathe to operate with the chosen spindle speed. This spindle speed makes your wooden piece move in rotations when being worked on.
The tailstock is located on the right side of the wood lathe, which is directly the opposite of the headstock. It can however change positions to wherever you want to adjust if you have trouble with positioning it during your project.
Tool Rest
The tool rest is a very important feature of the wood lathe, as it has been made purely for your convenience and safety. This part is for breaks between projects, when you want to put the wood lathe tool down and do other tasks. You can leave the lathe on rest and let it continue making even cuts on the wood.
Step 2: Setting It Up
Now for beginning to prepare the workstation for your project, you will need to set yourself up for safety precautions.
Make sure to wear tight-fitting clothes and have your hair tied up to avoid being distracted. This goes for any kind of hair length that could get in your eyes or down your shoulders.
You will need protective gear like goggles, ear protection gear, and gloves. Also, wearing any jewelry or accessories must be avoided during work.
Now to check up on the tools and wood you will work on, make sure the tool rest is nearby at all times. Keeping it near the wooden piece is a good idea. Try rotating the wood with your hands to see if it clears the tool rest.
You also need to remember to clean up wood shaving repeatedly to avoid a fire from breaking out.
After you have set up the work area, you will now need to choose the correct tool bit for the task at hand. The tool bits for your wood lathe must have to be really sharp to ensure you don’t damage the wood with rough and dull cuts.
Having sharp tool bits also helps secure the wood quickly and better. So, you won’t have to worry about the wood being misplaced, falling off the work table, or flying off the lathe when being rotated.
Our Recommend Wood Lathe:
Table could not be displayed.
Step 3: Application Of The Wood Lathe
When you want to perform woodturning with your wood lathe, it is wise to use a 90-degree angle with the blade on the wood. Keeping it at this angle helps the work performance be optimized and effective.
Use the tailstock, it has a wheel with which you can adjust it to a suitable position when you are woodturning. And this stock needs to be above the headstock’s spindle and also inside the center of the spur. After you turn the tailstock’s wheel, the position will be set.
You need to make sure the adjustments are tight so that they do not randomly readjust when the wood lathe tool is operated. If anything moves out of place, you might get hurt in an accident.
Turn the Wood Lathe on
After everything is fit tightly into the position you can turn your wood lathe on. It is best to start at the lowest speed setting and then move your way up the speed and power choices. Also, the speed you choose to turn wood with will vary depending on the hardness or texture of the wood you are dealing with.
You will understand the difference when you feel the pressure as it vibrates through the machine. There will be resistance against the wood when the pressure is applied as the tool bit moves through the wood.
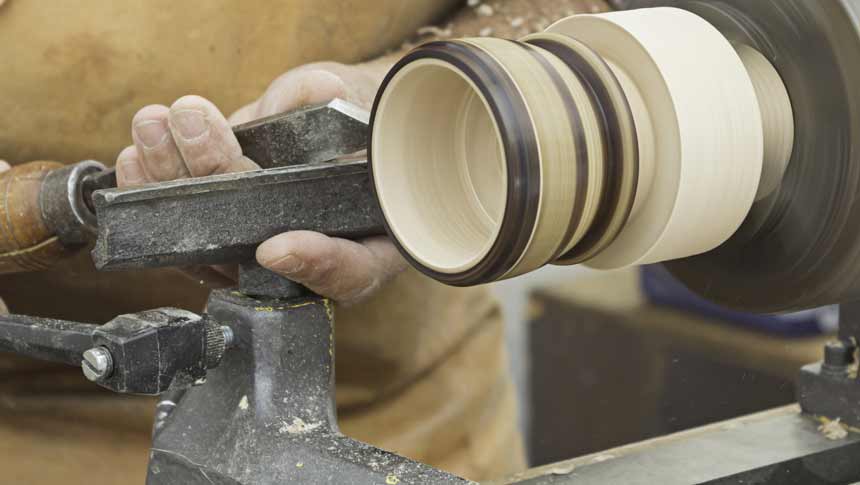
When you are cutting into the wood, you will eventually put the cutting edge of the blade on the tool rest. It will push forward to the wood on its own. Make sure to notice the blade staying at a 90-degree angle or a perpendicular angle towards the stock when it is about to touch the wooden piece.
This action should be done slowly to get accuracy in the angle. Plus doing it quickly can accidentally make you lose grip on the blade or accidentally break the tool off.
Notice the Chips
You need to notice the chips that fall off the stock when you are turning the wood. The size should be small and no bigger than a quarter of an inch lengthwise. After that, you will need to move the blade of the wood lathe parallel to the wood’s rotation.
You can try using a roughing gouge to make the chip fall off in a direction away from you so that you do not get hurt.
Check the Progress Again And Again
Repeatedly check the progress you have made on the wood piece by stopping the wood lathe from time to time.
If you are a beginner, it is best to stop after every few minutes so that you learn what kind of difference is created on the wood each time you turn the wood. Using calipers to measure the difference in the wood now is a good way to learn.
Finish the Process
Finally, when you get how it is working, you can keep it at high speed and finish off with the woodturning. Take the wood piece off and sand it until it is smooth.
Final Words
Using a wood lathe sounds a bit tricky and complicated. But if you follow the above instructions and steps, you will know exactly how to use a wood lathe.
You will need to have more experience and practice using the wood lathe tool for woodturning. After months of practice, hopefully, you will get the hang of it and will be able to operate faster with more accuracy and perfection on your project.