
Last Updated on October 29, 2021
Porcelain tile has recently become one of the most sought after choice of ceramics to decorate kitchens and bathrooms!
Although setting up porcelain is usually a simple task, but as the type of clay you’re working with is fired and glazed, there can be certain aspects to be wary of before implementing them.
Knowing what method to use for the process is the first step to take into consideration, as it can produce the most accurate results even though it can be done by hand, as well.
This how to cut porcelain tile guide will take you through several different processes of cutting porcelain and shuffle through all the methods to find the one that you’re most comfortable with, in order to get the best results!
Contents
Materials You’ll Need
- Wet saw
- Tile cutter
- Angle grinder
- Tile nipper
- Soft cloth
- Wax/grease pencil
- Ruler
- Dust mask
- Thick gloves
- Safety goggles
- Blade/cutter
- Rub block/sanding block
How to Cut Porcelain Tile Using a Wet Saw
Wet saws are considered the best method to cut porcelain because it’s not only precise but also because porcelain rarely absorbs water unlike other types of ceramics, so it causes a lot less damage in the long run.
Applying a wet saw is perfect for detailed and accurate cuts, especially if you’re working on a large project.
Step 1: Prepare Your Workspace
Make sure to set up your tank of water before starting to prepare the tiles. Put up a board on the back of the wet saw to block any excess water from leaving the tray.
Also, remember to keep your blade clean and sharp before beginning.
Step 2: Measure Your Cut
Use wax or a grease pencil to mark the cutting line of the tile. Make sure you have an accurate measurement for the cut. Apply a blade or a cutter to score along the cutting line for a smoother effect. You can also put masking tape around the edges of the line to avoid chipping.
Step 3: Start Your Cut
Turn on your saw and make sure the water is running properly before you begin the process. Gently cut along the lines and keep a few inches of space where the lines meet, to avoid any chipping. Cut the corner once you’re finished with both sides.
Step 4: Level Your Tile
Use a leveler to keep your lines and blade to the perfect level; this is to avoid any last-minute precision mishaps.
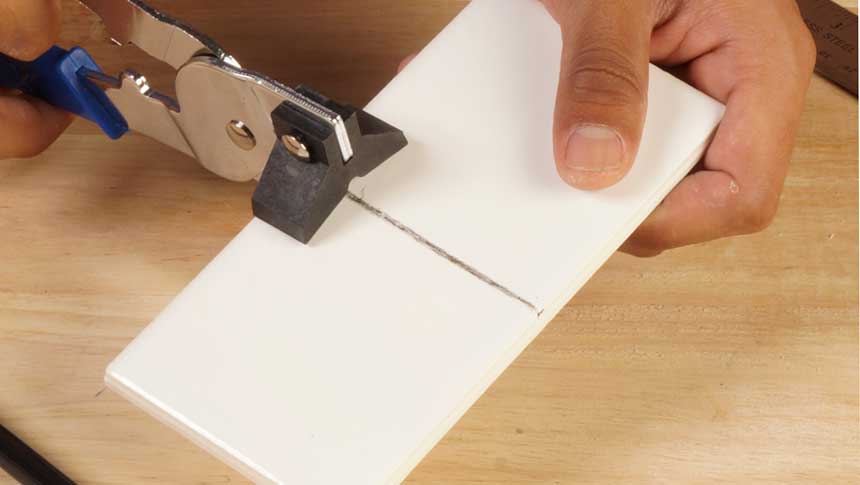
How to Cut Porcelain Tile Using a Tile Cutter
This method isn’t as precise as a wet saw, but professionals often prefer this because it’s often the cheapest yet accurate process available.
Unlike the wet saw, the tile cutter is specifically manufactured to take on any type of ceramic tiles. However, this is not exactly meant for bulk projects but rather to often fix small hiccups in the installation.
Step 1: Mark Your Tiles
Measure and mark where you need to make the cuts. Place the tile on an even clean surface to avoid any damage. You can also score along the lines for some extra precautions. Clampdown the tile to the surface for more control over the tile while you cut.
Step 2: Cut The Tile
Similar to using a wet saw, make sure you don’t cut to the edge of both of the lines, or else the tile might break. Don’t apply too much pressure when you’re pushing the tile forward. Keep even pressure on both sides.
Step 3: Smooth Out The Edges
Use a sanding block to sand out any uneven ridges on the corners after you’re done cutting the tiles.
How to Cut Porcelain Tile Using An Angle Grinder
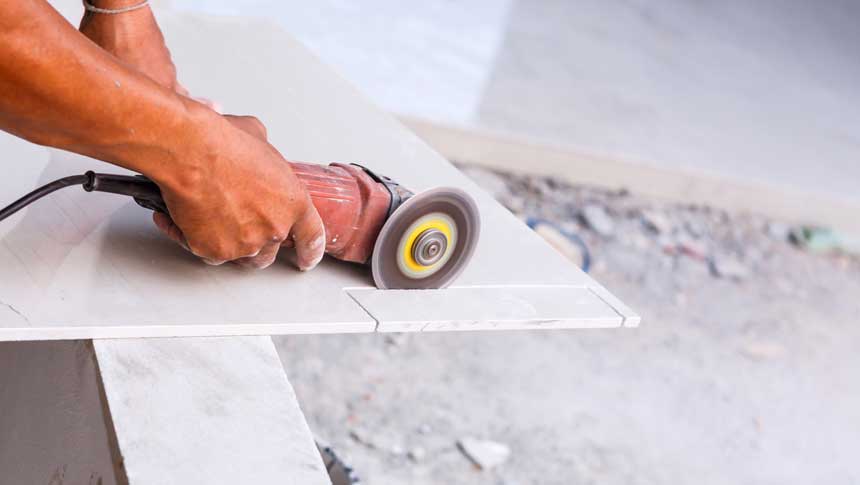
Angle grinders are perfect for cutting out various types of shapes from tiles. If you need a specialized cut of tile, an angle grinder is a perfect tool for the job! Professionals tend to use the angle grinder for intricate designs on tiles, often for personalized aesthetics.
Step 1: Prepare Your Workspace
Clean out your workspace and place a soft cloth on the table to prevent any external damages. Clampdown your tile to the surface to avoid any operational mishaps. Make sure to use an angle grinder on a well-ventilated area, as the excess dust can become an obstruction during the cutting process.
Step 2: Mark/ScoreYour Tile
Use any marker to measure out where you want to cut; the shape can be semi-circular or even circular. And use a blade or cutter to score along the lines using your marker, use masking tape along the edge of the lines for a cleaner cut.
Step 3: Cut The Tile
Hold the blade at a lower angle to start cutting and make sure you follow the required pressure and speed before you begin. Don’t cut it all the way across instead of cutting deeper with every stride. Smooth out the edges of the line with the flat side of the blade. Use a sanding block to sand the edges for a more clean finish!
How to Cut Porcelain Tile Using a Tile Nipper
Tile nippers are used for extremely small cuts and often circular sections of the tile. This method is done by hand for maximum precision. These depend on the hand’s pressure for the cut, so make sure you follow the required pressure for your exact tile shape and edge.
Step 1: Mark Your Tile
Measure out where you want to cut, use a shallow cutter to score along the lines. Use your cutter to cut 1/16 inch deep into the tile so it can easily break with the nipper.
Step 2: Cut The Tile
Do not put pressure directly on the line, instead start from the edge and cut the tile little by little until you get to the line.
Step 3: Apply Finishing Touches
Using a rub brick or a sanding block to smooth out the edges. As the nipper can only break small pieces, remember to wear the necessary protection.
Important Tips to Follow
- Apply even pressure during the entire process to avoid any cracks in the tile. This gives you an extra force to keep the tile in place and control your cuts.
- Create shallow cuts when you’re scoring along the lines, any deeper than 1/16 inch, and you may damage the porcelain.
- Wear thick gloves when you handle the saws and power tools. Make sure your workplace is dry and well-ventilated.
- Make sure to properly follow the steps of the manufacturer when assembling your tools, i.e. the angle grinder.
Try Your Hand at Personalizing Your Porcelain Wall!
Now that you know what steps to take to properly cut and install any type of porcelain tile, you can add your own flair to your décor or even create your own designs.
This article will help you cut any porcelain tile into any size or shape to fit your needs!
More Buying Guides: